核心内容:
在fedora13下从源码编译安装xdebug; 如果仅仅需要在linux/fedora13,14下安装xdebug,请参看本文,直接下载二进制文件并安装使用 fedora linux下php调试利器xdebug 2.1.0下载/fedora13,14测试通过
环境:fedora13 apache2.2 php5.3.1
首先从xdebug官方网站下载得xdebug最新稳定版的源码,解压缩,查看其中的README文档。
文档里说得很清楚,需要有phpize与php-config,apache与php都是通过fedora yum安装的,通过whereis 命令查找,及在php目录里都没有找到这样的两个文件,于是yum provides */phpize于
[root@fsc xdebug-2.1.0]# yum provides */phpize
已加载插件:presto, refresh-packagekit
php-devel-5.3.1-3.fc13.i686 : Files needed for building PHP extensions
Repo        : fedora
匹配来自于:
Filename    : /usr/bin/phpize

php-devel-5.3.3-1.fc13.i686 : Files needed for building PHP extensions
Repo        : updates
匹配来自于:
Filename    : /usr/bin/phpize
phpize就在包php-devel-5.3.1-3.fc13.i686里(同样方式查询yum provides */php-config,也在php-devel包里),yum安装php-devel就可以了,如下
yum install php-devel
参考xdebug的README,进入解压缩后的xdebug目录里,执行phpize,看到几行信息输出;
下一步,
./configure --enable-xdebug
运行正常,next ,就是最常见的make
make
花费时间长一点,好几分钟,让它自己编译,干点别的。完成后看make输出的最后一行说什么donot forget run ‘make test’(本文是根据回忆写的,可能有不准确之处),运行一下,好像有警告信息,不管它,官方文档里没有这一步,可能只是为了检查运行完全正确,忽略它。
下一步复制xdebug.so到php扩展目录。先要查看php的扩展模块在哪个目录里,我使用一个简单的php程序<?php phpinfo();?>查看配置信息,![]()
得知是/usr/lib/php/modules目录,
[root@fsc xdebug-2.1.0]# cp modules/xdebug.so /usr/lib/php/modules/
建一个文件/etc/php.d/xdebug.ini内容如下
zend_extension=/usr/lib/php/modules/xdebug.so
[Xdebug]
xdebug.profiler_enable=on
/etc/php.d/xdebug.ini
(这部分也完全可以放到php.ini文件里,放到php.d目录里,是为了配置文件相互独立,管理方便)
安装完毕,优雅重启apache
[root@fsc xdebug-2.1.0]# /etc/init.d/httpd graceful
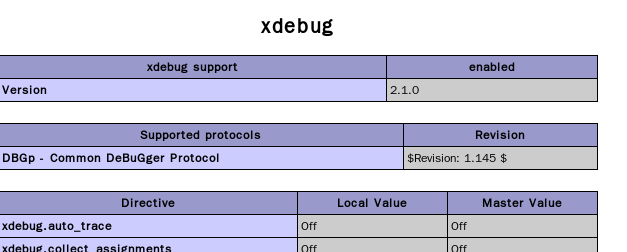
xdebug加载运行正常。
php错误消息显示默认是以text文本形式显示的,xdebug显示调试信息时,信息量一般都比较大,最好打开php的html_errors,这样可以显示更友好的调试信息。可以在/etc/php.d/xdebug.ini里面加入下面一行
html_errors=on
当然也可以加入到php.ini文件里。
[附] xdebug 2.1.0 源码里的README文档摘选
——————–README 文档节选—————————————————————–
XDEBUG
——
You need to compile Xdebug separately from the rest of PHP. Note, however,
that you need access to the scripts “phpize” and “php-config”. If your
system does not have “phpize” and “php-config”, you will need to compile
and install PHP from a source tarball first, as these script are
by-products of the PHP compilation and installation processes. It is
important that the source version matches the installed version as there
are slight, but important, differences between PHP versions.
Once you have access to “phpize” and “php-config”, do the following:
1. Unpack the tarball: tar -xzf xdebug-2.1.x.tgz. Note that you do
not need to unpack the tarball inside the PHP source code tree.
Xdebug is compiled separately, all by itself, as stated above.
2. cd xdebug-2.1.x
3. Run phpize: phpize
(or /path/to/phpize if phpize is not in your path).
4. ./configure –enable-xdebug (or: ../configure –enable-xdebug
–with-php-config=/path/to/php-config if php-config is not in your
path)
5. Run: make
6. cp modules/xdebug.so /to/wherever/you/want/it
7. add the following line to php.ini:
zend_extension=”/wherever/you/put/it/xdebug.so”
8. Restart your webserver.
9. Write a PHP page that calls “phpinfo();” Load it in a browser and
look for the info on the xdebug module. If you see it, you have been
successful!
——————–END of README 文档节选—————————————————————–


0 条评论。